Clean Up My Mac Storage
Learn effective methods to optimize your Mac’s storage space for improved performance and efficiency.
– Discover how to check your current storage usage and the importance of understanding which files take up the most space.
– Learn to utilize built-in macOS tools like “Optimize Storage” and “Reduce Clutter” to streamline your files and applications.
– Get tips on safely deleting unnecessary files, managing applications, and using iCloud and external drives for better storage management.
Are you wondering how to clean up my Mac storage effectively? Keeping your Mac’s storage clean and organized is vital for its performance. A cluttered storage system can slow down your device, hinder software updates, and even cause system crashes. Many Mac users experience the annoyance of low disk space warnings, often right before an important task.
The phrase “clean up my Mac storage” is more than just a search term; its key to maintaining your devices health. In my personal experience, after struggling with constant low storage notifications, I implemented a systematic approach to managing my files. This guide provides effective steps to reclaim storage space, ensuring your Mac runs smoothly and efficiently.

Understanding Mac Storage
Storage Organization on a Mac
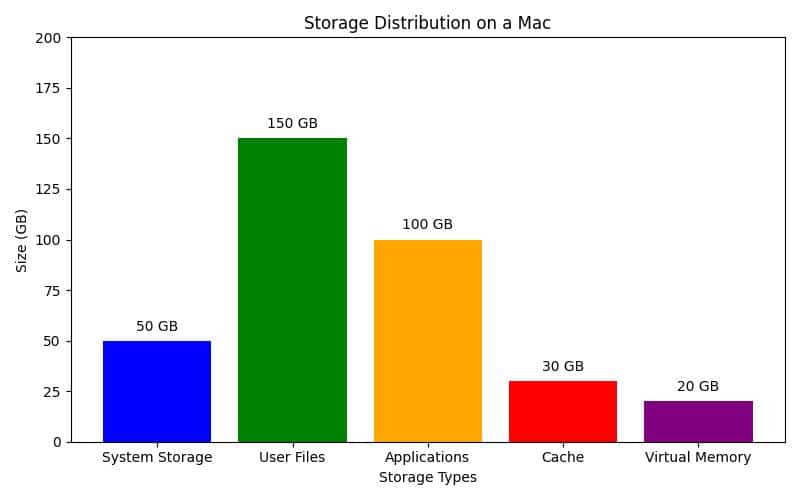
Mac storage divides into several categories: Applications, Documents, Photos, Music, and more. Each category serves a purpose, and knowing how theyre structured helps you locate files that consume unnecessary space.
- Applications: These are the software programs installed on your Mac. Some can be quite large, especially those with multiple components.
- Documents: This folder contains text files, spreadsheets, presentations, and other data. It can accumulate content over time that you may no longer need.
- Photos and Videos: Media files can occupy significant space. High-resolution images and videos can quickly fill your storage.
- System Files and Caches: These files are essential for your Mac’s operation but can also grow large over time.
macOS Storage Management Tools
macOS includes several built-in tools to manage storage effectively. One of the most useful is the Storage Management feature, which provides an overview of your storage usage and offers tips for optimizing space. Access this tool through the Apple menu:
- Click the Apple menu in the top-left corner.
- Select About This Mac.
- Click the Storage tab, then select Manage.
Here, youll find options like Optimize Storage and Reduce Clutter, all designed to help you free up space on your Mac.
Checking Current Storage Usage
Step-by-Step Guide
Before cleaning up, check your available storage. Follow these steps:
- Open the Apple Menu: Click the Apple logo in the top-left corner.
- Select About This Mac: Choose this option from the dropdown menu.
- Go to the Storage tab: Here, you’ll see a visual representation of your storage allocation.
Importance of Knowing Available Storage
Understanding your current storage usage is the first step toward cleaning up your Mac. It helps you identify which categories consume the most space, allowing you to prioritize your cleanup efforts. For example, if your Documents folder is overflowing with old files, it may be time to sort through and delete those no longer needed.
Personal Experience: A Journey to Free Up Mac Storage
The Frustration of a Full Hard Drive
Last summer, I found myself in a predicament that many Mac users can relate to: my laptop was running slower than a dial-up connection, and I was receiving constant alerts about low storage space. As a freelance graphic designer, my work relies heavily on large files, and I knew I needed to take action.
The Wake-Up Call
One day, during a crucial project deadline, my Mac crashed unexpectedly due to insufficient storage. This incident was a turning point; I realized that I had been neglecting my Macs storage needs for far too long. Determined to prevent this from happening again, I decided to clean up my Mac storage once and for all.
The Clean-Up Process
I began by checking my storage usage under “About This Mac,” which revealed that I had over 60GB of files I no longer needed, including outdated project files and forgotten downloads. I utilized the built-in “Storage Management” tool, optimizing storage and reducing clutter. It was surprisingly satisfying to see the available space increase as I deleted old applications and large files.
I also turned to iCloud for additional storage, carefully syncing my essential files while offloading the rest. This not only freed up space but also provided peace of mind knowing my work was backed up.
The Outcome
By the end of my clean-up process, I had reclaimed over 80GB of storage! My Mac was running smoothly again, and I felt a renewed sense of productivity. This experience taught me the importance of regular maintenance and has since become part of my routine to ensure my Mac stays in top shape.
If youre struggling with similar issues, take it from me: a little effort in cleaning up your Mac storage can go a long way in enhancing performance and efficiency.
Using the Built-in Storage Management Tools
Accessing the “Optimize Storage” Feature
The Optimize Storage feature automatically frees up space on your Mac. Heres how to use it:
- Go to About This Mac > Storage > Manage.
- Click Optimize Storage.
- Follow the prompts to enable the feature.
This tool helps remove movies and TV shows youve watched. If you have iCloud enabled, it can offload files to the cloud when storage runs low.
Utilizing “Reduce Clutter”
The Reduce Clutter option within the Storage Management tool helps identify large files and downloads that may occupy space unnecessarily. Heres how to use it:
- Open About This Mac > Storage > Manage.
- Click Reduce Clutter.
- Review the listed files and delete any that you no longer need.
This step effectively clears old downloads and large files you may have forgotten about.
Deleting Unnecessary Files
Identifying Large Files and Old Downloads
To clean up your Macs storage, identify and delete large files and old downloads:
- Open Finder and go to your Downloads folder.
- Sort files by size or date to spot large or outdated files.
- Delete files you no longer need or move them to an external drive.
You can also use Finder’s Search function to find large files:
– Open Finder, press Command + F, and set the search criteria to show files larger than a specific size.
Emptying the Trash
After deleting files, empty your Trash to permanently remove them from your Mac:
- Right-click on the Trash icon in your dock.
- Select Empty Trash.
This step is critical for reclaiming the space those files occupied.
Managing Applications
Uninstalling Unused Applications
Applications can consume significant storage, especially if outdated or unused. To uninstall applications:
- Open Finder and go to the Applications folder.
- Drag any unused applications to the Trash.
- Empty the Trash to permanently remove them.
For a thorough cleanup, consider using an uninstaller app that can remove associated files and folders that may remain after dragging the app to the Trash.
Tools to Analyze Storage Use
Several applications help analyze your storage use and identify files for cleanup. Popular options include DaisyDisk, CleanMyMac X, and Disk Inventory X. These tools provide visual representations of your storage usage and help pinpoint large files and folders quickly. However, it’s crucial to verify the safety of any third-party tools you consider. Look for user reviews, check for security certifications, and download only from reputable sources to minimize risks.
Using iCloud for Storage Optimization
Benefits of iCloud
Using iCloud can significantly help free up space on your Mac. By storing files in the cloud, you can keep your local storage clean while still accessing your data when needed. Here are some benefits of using iCloud:
- Automatic backups: iCloud can back up your files automatically, allowing you to delete local copies.
- Access from anywhere: With iCloud, access your files from any device with an internet connection.
- Shared storage: Share storage across multiple Apple devices.
Tips for Effective iCloud Usage
To maximize iCloud benefits, consider these tips:
- Regularly review files stored in iCloud and remove any you no longer need.
- Manage your iCloud storage settings to avoid paying for more space than necessary.
- Use the Optimize Mac Storage option to automatically store older documents in iCloud.
External Storage Solutions
Types of External Drives
If your Mac’s internal storage frequently fills up, consider investing in an external drive. The two main types are:
- HDD (Hard Disk Drive): Generally more affordable with larger storage capacities but slower than SSDs.
- SSD (Solid State Drive): Faster and more reliable than HDDs but typically more expensive per gigabyte.
Choosing the right external drive depends on your storage needs and budget.
Setup and Management of External Devices
To use an external drive effectively:
- Connect the drive to your Mac via USB or Thunderbolt.
- Open Disk Utility and format the drive for Mac (APFS or Mac OS Extended).
- Move files to the external drive to free up space on your internal storage.
Regularly check the contents of your external drive to ensure its organized and that youre not using it as a dumping ground for unnecessary files.
Clearing Cache and System Files
Understanding Cache Files
Cache files are temporary files that help applications run faster by storing data that would otherwise need to be downloaded or calculated each time. However, these files can accumulate over time and take up substantial space.
Safe Methods to Clear Cache
To clear cache files safely:
- Open Finder and click Go in the menu bar.
- Select Go to Folder and enter
~/Library/Caches. - Review the folders and delete the contents you deem unnecessary.
Be cautious not to delete entire folders, as this may interfere with application performance. Clear cache files only for applications you know.

Regular Maintenance Tips
Best Practices for Long-Term Storage Management
To keep your Mac storage clean and organized, consider these best practices:
- Schedule regular clean-up sessions every few months to review and delete unnecessary files.
- Use cloud storage solutions to minimize local data storage.
- Regularly uninstall applications you no longer use.
Scheduling Regular Storage Checks
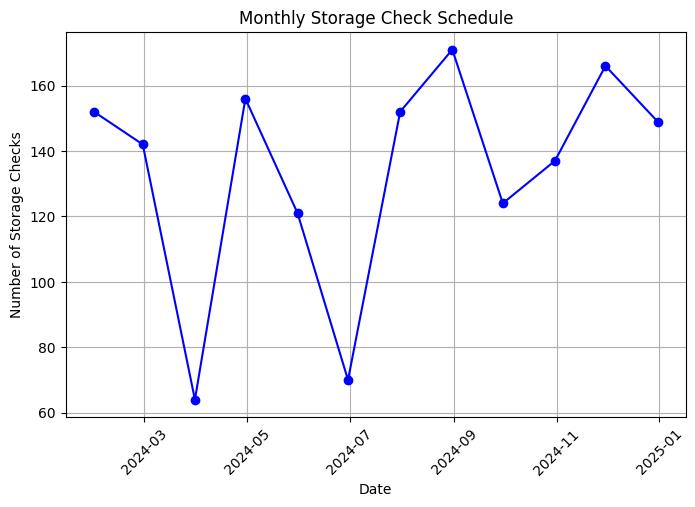
Set reminders on your calendar to check your storage usage regularly. This practice helps you stay on top of storage management and prevents issues before they arise.
Using Third-Party Tools Cautiously
Pros and Cons of Third-Party Cleaning Software
While many third-party tools exist for cleaning up Mac storage, they have both advantages and disadvantages:
| Pros | Cons |
|---|---|
| Automate the process, saving time | May delete files you want to keep |
| Additional features like duplicate file finders | Potential risk of malware with untrusted software |
Recommendations for Reliable Tools
If you choose to use third-party cleaning tools, opt for reputable options such as:
- CleanMyMac X: A comprehensive tool offering various features for cleaning and optimizing your Mac.
- DaisyDisk: Provides a visual representation of your storage usage and helps quickly identify large files.
Always read reviews and ensure the tools you select have a good reputation in the tech community. Additionally, verify the software publisher’s site for security certifications before downloading.
Conclusion and Summary
Cleaning up your Mac storage is essential for optimal performance and preventing issues related to low disk space. By following the steps outlined in this guideutilizing built-in tools, deleting unnecessary files, and using iCloud effectivelyyou can reclaim valuable storage space and keep your Mac running smoothly. Remember, a well-maintained Mac not only enhances your productivity but also extends the lifespan of your device.
